Tutorial
How to Edit Info Panels
02
Feb
Feb
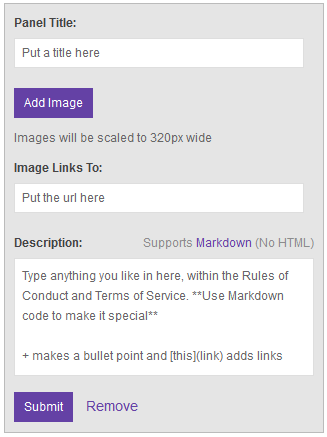
To create or edit a panel:
- Click the Edit Panels switch from “Off” to “On” in the top left of your channel page underneath the video screen
- Edit the panel as you desire by adding a panel title, image, embedded image link, and description (where you can add more links using Markdown code)
- Click Submit to save the panel
- To add another panel, click the + sign and a new panel will appear
- Click the Edit Panels switch from “On” to “Off” to return to the regular channel page view, to see your finished panel look

To delete a panel:
- Click the Edit Panels switch from “Off” to “On” in the top left of your channel page underneath the video screen
- Click Remove to delete the panel
- Click the Edit Panels switch from “On” to “Off” to return to the regular channel page view, to see your finished panel look
To rearrange your panels:
- Click the Edit Panels switch from “Off” to “On” in the top left of your channel page underneath the video screen
- Hover over the panel you wish to move and the movement cursor icon will appear
- Click the panel and drag it to your desired location in the panel arrangement
- Release the panel from your left-click hold
- Click the Edit Panels switch from “On” to “Off” to return to the regular channel page view, to see your finished panel look
NOTE:
- File sizes for images must be under 2.9 MB
- images should be no larger that 320px wide and 300px high (otherwise they automatically resize to these maximums)
- Descriptions can be stylized in Markdown (sorry, no HTML). See some simple Markdown coding examples below. To learn more about how to use Markdown code, read this article.
Source: Help.Twitch.tv